Testing the machine
Connect the wall plug to your machine and turn it on. Be prepared to turn it off if you hear any grinding noises or other strange things happening.
Make sure your laser enable switch is OFF and power set to zero. Do not connect your computer yet.
Your machine should now home to the top left corner, as shown in the video below.
You can now turn off your laser machine when you confirmed it homed correctly. If it did not – read this article
Water cooling
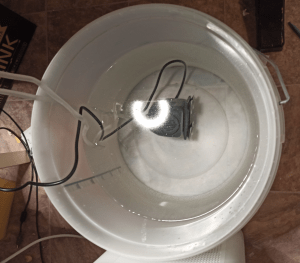
Take out a tank or bucket for your water cooling. Put down the included pump and at least 5 litres of water. Connect the pump to the hoses on the machine and turn on the pump.
Do not use the outlets in the back of the laser machine, they are very sloppy and there is a risk the connector falls out and you burn out the laser tube.
Run the pump a few minutes and inspect for leaks.
Some K40 versions have a water flow sensor, you can see a sensor attached to your water lines with two cables routed to the power supply. If the flow isn´t enough you cannot fire the laser. If you don´t have this sensor, i would suggest bying one.
I used a 25 liter bucket made to make wine at home, they are perfect for this application. Just dunk the pump in and test it.
I did not fasten the pump with the suction cups, as i´m about to rebuild the cooling setup anyway, this was just for a short test.
Turning on the machine
Take a coin smaller than 20mm and put some tape over it. Put the coin and tape in front of Mirror no2, close the lid and push your laser test button, do not mind where the dot ends up, we are just checking so it hits inside the mirror to start with. You can remove the coin and tape now.
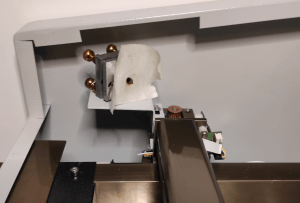
Next step you put some tape over mirror 3 on the laser head just to make sure it hits the laser head.
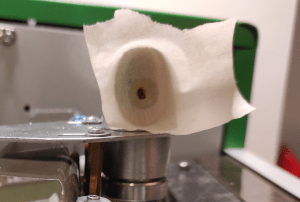
And the last step, put in some material in the laser machine and do a test fire to make sure it hits your material.
Here you can see my test-fire.
I forgot the coin behind the tape on the 2nd mirror and it caused some dirt on the mirror, use a coin… 🙂

Connect your computer
Turn on your computer, turn off your laser machine and after that connect the USB-cable to the laser controller board.
I have installed K40 whisperer – download here – and i have not connected the USB key delivered with the machine, this is just a hardware lock for use with LaserDRW or CorelLaser.
In K40 Whisperer – set up your machine by using the M2 setting – If you have trouble finding the correct board or have other issues, please refer to the K40 Whisperer website for more details
Here is a full installation guide for K40 Whisperer (external link)
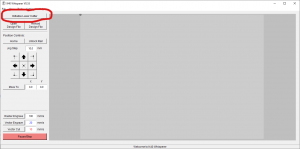
Click on initialize laser cutter.
You are now ready to test the machine with a test. You can download a SVG file here for test purposes.
Click on Open design file – and chose the file you just downloaded, or a file you made yourself.
Aligning and optimizing focus comes later – we are just making sure we have a good connection between the PC and the laser, and that the laser tube works with commands from the computer.
Set your power on the machine, if you have analog machine turn the knob and test-fire until you see roughly 6-7-8mA on the meter, for digital panels, set it to 30-40% and do a test fire to see if hits the material.
Use the settings by default in K40 Whisperer and click on Raster engrave, and after that vector cut.
You should now have a piece of material cut – if it didn’t cut through don´t be scared, we were a bit low on power just to learn how the machine reacts and works. All K40s are different and the power i use will not be the power you need and vice versa.
Adjust your power and repeat the cut and/or engraving until it works for you.
Congratulations
You have now made your machine safe and you have verified the basic functions of the machine.
It´s tempting to start throwing material in your laser machine right now – you can if you want but follow the rest of the articles here and learn more how to optimize and make your K40 better. The state it is in right now is less than half of what it really can do!
thank you – thank you !!
just a few observations about the first lesson and setup
when I first connected the machine there must have been a bad earth.
i know this because when i touched the machine with the inside of my forearm- there was a tingle tellin of a bad earth.
Installing a good earth immediately resolved that problem
secondly- perhaps you would consider adding the following to the startup.
Before trying a test fire make sure that the water is running. if not my machine refuses to fire ( a good safety feature but at lease 30 minutes trying to find our why it wont fire.) I set the power to 20% for the first shop and it was enough.
Good point! Not all machines has the water flow sensor though. But a good idea to make this very imporant in the article! Thank you!
I have added a warning-box now with reminder about the water cooling, and some text about the flow sensor.